- Brazilian Waxing Pro: Gentle but effectively eliminates stubborn and unwanted bikini hairs; made for the bikini but can also be used on other delicate parts like the underarm and face; safe and comfortable waxing; adheres on the hairs and not the skin
- Natural-Based Ingredients: Made with Honey that not only aids in efficiently removing hairs but also helps in pore cleaning and eliminating dead skin cells; protects skin from harmful free radicals; relieves dullness giving a brighter and lighter complexion
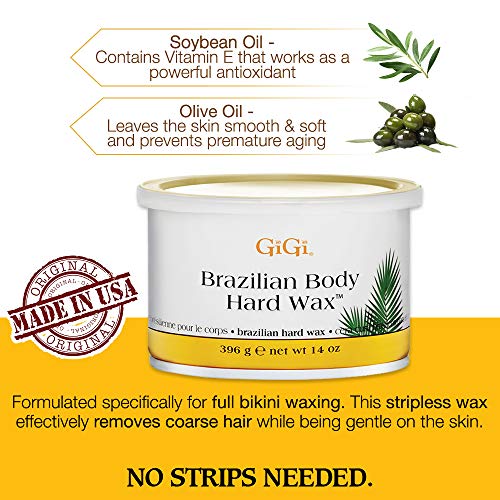
- Easy Prep and Use: Comes in a 14-ounce wax container sealed with a plastic lid for easy storage; no cloth or epilating strips required; very thick formulation for easier grabbing and pulling; great for DIY waxers at home who have limited space counters
- Time and Money Saver: Ideal for waxers who do not want to spend too much time and money with regular salon visits; brings the spa at home and lets you experience personal pampering and self-care any time of the day; same pro results but a lot cheaper
- Trusted Skin Waxing Brand: GiGi is known as one of the top-notch makers of excellent waxing products with easy-to-follow instructions and 100% cruelty-free; perfect for beginners and DIY treatments; a leader in the hair removal industry for over 40 years


 Himalaya Botanique Kids Toothpaste, Herbal, Cool Mint, Bubble Gum and Orange Flavor, Fights Plaque, Fluoride Free, No Artificial Flavors or Colors, SLS Free, Gluten Free, Vegan,...
$12.00
Himalaya Botanique Kids Toothpaste, Herbal, Cool Mint, Bubble Gum and Orange Flavor, Fights Plaque, Fluoride Free, No Artificial Flavors or Colors, SLS Free, Gluten Free, Vegan,...
$12.00
 Speed Stick Antiperspirant & Deodorant Solid, Unscented, 3 oz
$2.60
Speed Stick Antiperspirant & Deodorant Solid, Unscented, 3 oz
$2.60
GiGi Brazilian Body Hard Wax, Smooth and Soft Bikini, Non-Strip, Suitable for Sensitive Skin, 14 oz, 1-pc
Original price was: $14.90.$11.70Current price is: $11.70.
-21%


Milvia –
Arrived very quick and in great condition
S –
This is my go-to wax! I have been using Gigi All Purpose Honee Hard Wax for a little over a year. I have PCOS and grow thick hair on my face. This wax has been able to remove thin and thick hair with ease along with really short hair. The only complaint is that the wax pulls what’s underneath it too good and can pull the skin if you don’t apply baby power or arrow root powder before you apply the wax. Other then that this wax is a staple.
Somal –
It is best among all, i’ve tried using a lot of hard waxes out there but nothing beats this one. I’ve purchased this more than 10 times in the past 6 months period. It can kinda get sticky on your fingers and all but no need to worry just massage any kind of oil on top of it and you’re good to go 😉
Isabella B & Sir Cat –
This might be a bit of a long review, but I want to share 8 years of trial and error with this Gigi Hard Body wax. I am not a licensed professional, just a person who wants to save money by doing my own waxing at home.
For starters, this wax does not require the fabric strips. If that’s what you want/like to use, this isn’t the right wax for that method. Don’t know much about that kind of wax except to say that it’s sticky/gooey and I hate it. Used it once, it was a complete disaster and a mess, threw everything in the trash and went back to this. This is the easiest wax to use!!!
Moving on, buy the big warmer that they sell for these cans of wax, the one with the temperature control. Also, having the cardboard ring that goes around the can while it’s sitting in the warmer is nice. It prevents the wax from getting dripped down into the edges of the can when its in the warmer. No matter how hard you try, you are going to drip wax. Just expect that. Protect your bathroom counter with paper towels and spread a big garbage bag over where you’ll be standing while doing this. Wear old clothes if you have to have something on. If you have a nice manicure, wear gloves or you will be spending time picking wax off your nails. I recommend waxing right before getting a new manicure if you can. If you color your brows, do that the day before you wax. And remember, if you have long hair, tie that up or it will find its way getting stuck in the wax!!
Here’s how to work with Gigi Brazilian Body Hard wax. It should come with a clear plastic seal around the lid on the outside edge of the can. There is no inner seal. Take the plastic wrap and the lid off. Place just the can (and the cardboard ring if using one) in the warmer and turn it up to the highest setting. Go do some laundry, watch tv, make a sandwich. A new can will take 1-2 hours to melt. You can stir it around with a stick every 20 minutes or so if you want.
The most important thing to understand…..getting the temperature of the wax right. For starters, the whole can needs to be evenly warmed to the same consistency, so expect the wax to be too hot after its melted. It almost always is. How do you check? Place an applicator (popsicle) stick in, stir it around good and hold it up over the can. If the wax drizzles off the stick fast and it’s really runny…..it’s way too hot!! Stop right there and turn the warmer off or down to the lowest setting. It needs to cool. If the wax is too cool, it will be like stirring an old container of super thick cake frosting. Turn the temperature up slightly and wait. Eventually, you will get the wax to the perfect temperature. The way to tell? If the wax has the consistency of honey, then you’ve got it right where you want it. Test it on the inside of your wrist. It should feel warm, but not scalding hot. To keep the wax at that honey-like state, you might have to switch the temp on the warmer up and down throughout the whole process. You’re almost ready to start the fun part.
Put some olive oil on a cotton round, not too much, and lightly go over all areas to be waxed. (If you’re doing your brows yourself, go over your eyelashes with a heavier dose of olive oil too, just in case they touch the wax. Really long lashes can get stuck by accidentally blinking right after you apply wax under your brow, so be aware of that. This can happen if you’re standing up looking in the mirror.) The olive oil serves to prep the skin and helps the wax easily pull off. I don’t know anything about using powder, but I would think it would cause this wax to bond with your skin and be incredibly difficult to get off. Play it safe and go with the olive oil.
Time to get waxing!!! Pull the skin taught and smooth if you can and get ready to apply the wax. (*TIP* The applicator should have wax on one side only. Scrape the backside of the applicator off on the edge of the can as you get the wax onto the top side of the stick. Doing this prevents you from dripping wax all over everything!!!) Spread the layer of wax up and against the direction of the hair growth. The layer of wax should be about the thickness of a dime to a quarter, but this varies from area to area. (That’s just a general giudeline for anyone new to this.) The wax will harden in 1-2 minutes and the edges will start to come up when it’s ready to pull off. If it feels like gooey bubblegum, you’ll need to wait a few more minutes. When you and the wax are ready, grab the edge and pull fast. I pull down (in the direction of the hair) and it seems to hurt less.
A few notes about the discomfort. Its going to hurt. Expect that. You are ripping the roots of the hair out from below the skin. The trade off is that it doesnt grow back for 1-3 weeks!! The hair should be rather short before waxing. (For measure, I’d say long enough to grab it good with tweezers if you were going to pluck it.) The longer it is, the more it hurts. The thicker it is, the more it hurts. The good news (yes there is some) is that the more you wax, the less it starts to grow in over the years. I’ve invested 8 years to ouches and profanity, and I’m seeing less and having to do it less often.
Peach fuzz on your face that picks up powdered makeup? No problem!! That comes off regardless of how fine or short it is. Be careful on your face and try the neck area first for practice if you’re not sure. I mastered eyebrows first and then eventually moved on to experiment with waxing off the microscopic facial hair I could barely see. And to bust a myth…waxing will not make facial hair grow in thicker. Those little personal facial shavers are what cause that lovely problem, so skip those gadgets and save yourself the aggravation. Waxing gets it all!!!
What else? I’m thinking. Oh yes. To apply wax, use the big wooden applicators for everything but brows. Brows need the skinny applicators. You will find that it’s hard to get all the hair with one pass with the wax. It says not too, but you can wax the same area more than once. I find two passes with the wax to be most effective in getting everything. No big deal for me, but to err on the side of safety, I would say that all depends on the person’s tolerance level and the sensitivity of the skin to the wax. If you can only manage to do each area once, clean up the leftover hair with tweezers. To remove excess wax…go over it with olive oil and it will release from your skin. Shower after waxing. If not, you will find yourself sticking to your clothes and underwear like velcro. Use a loofah glove and soap and gently go over all the areas you did from your neck down. For your face….be sure to get the olive oil off of your skin as soon as you can. Ponds works great for an initial gentle cleanse, then follow with whatever you use to wash your face. Avoid microdermabrasion or harsh scrubs for a day or two after.
Ingrown hair and red bumps are sometimes an issue with waxing. No worries there. Amazon sells a product called Tend Skin Solution. This stuff is great and fixes that problem in a few days.
Ok. So that was my Gigi Wax 101 Tutorial. Remember to be patient with yourself (or whomever has asked you to do this for them) and don’t try this for the very first time 2 hours before a date. This should be done when you have an uninterrupted block of time. Some privacy or having the house to yourself helps too, especially if you have a roommate, kids, or significant other that might end up banging on the door wanting to know what you’re doing!
If I’ve forgotten anything, I’ll update this. I swear by this wax and I recommend it to anyone who asks what product I use.
Bonnie christiansen –
Love the product, love the aroma !
Angie G –
Ignore any negative comments you’ve read about this product. The wax is amazing, and any trouble that arises with it is all about temperature and technique. I’ve been using this for years, and I’ve perfected the technique over time. Believe me when I say the trouble is not the wax. You will NOT be an expert the first time, but it gets easier and faster each time. That being said, the first time I used it, I thought I might be walking around with great globs of wax attached to my hoo-ha until I had them surgically removed. It was bad….REALLY bad. So know that I have experienced everything that can go wrong with the wax, and I still say it is not the fault of the wax. To help others avoid the pitfalls, I’ve decided to share some pointers.
*Supplies you’ll need: paper towels or an old towel, a mirror, warmer and wax, wooden spatulas (tongue depressors work too), baby powder, baby oil, scissors if your hair is long, and No Bump to apply to freshly waxed skin
*Before you do anything else, trim your hair to about 1/4 inch. If you don’t, it’s going to hurt more, be more difficult to remove, and potentially pool in a way that makes it almost impossible to remove.
*If this is the first time waxing, or if you’ve had difficulty in the past, make sure you’ve got a couple hours to devote to the waxing process. (This doesn’t include time to heat the wax.)
*Heat your wax. While this sounds simple, it’s one of the most crucial steps to success. It takes the warmer a long time to heat the can of wax when it’s new. Be patient. I turn it on high until it’s hot, then turn it to low once it’s heated. The consistency of the wax when you apply it is so important. You’ll need a wood spatula (they come in the kit) to stir and apply the wax. When you dip the spatula in, the wax should not run off like water. If it does, it’s too hot and thin and won’t provide good coverage. It might also crack, making it really difficult to remove. If it’s too thick, like honey, you’ll not only waste a lot of wax, but it will take longer to dry. The consistency should be somewhere between water and honey. It is far better to have it somewhat closer to honey than
water.
*Take a couple Advil about 20-30 minutes before you apply the first bit of wax. It really helps. I have forgotten before and could definitely tell a difference.
*Spread a towel or paper towels on the floor to catch any drips. I either stand or sit on the floor for the waxing.
*Get out the baby powder. It is your new best friend. Some people use oil at this point, but I had trouble getting the wax to stick to the hair. Anyway, I liberally apply baby powder to the spot I’m getting ready to wax. The powder keeps the wax from sticking to your skin, but dries the hair so it sticks to it. I also dump some into my hand and rub it all over both of them so there’s a coating on them. This will keep wax from sticking to your hands when you either drip it on them or try to pull wax before it’s completely ready. Now it’s time to start waxing.
* Dip your spatula in and get a glob of wax on it. I hold it above the warmer for a few seconds and run the bottom over the edge of the can to scrape off drips. Apply the wax to a small section, maybe 1 x 2 inches. I always start on the outside and work my way in. Run the wax in the direction the hair grows, from the root to the end. You want the wax to be dry enough to peel, but not too dry. Since my hands are always coated with powder, I gently pat the wax a couple of times. It should be dry enough to remove within just a few seconds if your temperature is right. (When you apply the wax it should feel really warm, but certainly not hot enough to hurt you.) With your free hand, hold the skin taut above and below the waxed patch. With your other hand, grasp the bottom end of the wax. Technique is important. Imagine you’re peeling the wax off, not pulling it. This can be achieved by keeping your pulling hand close to the skin as you peel back toward the base instead of pulling upward. If wax drips somewhere, or if you got it on you fingers while peeling, it’s a good idea to let it dry before attempting to remove it.
*Powder the next section, and maybe your hands again if they need it. Keep doing small sections. I like to leave the landing strip until last, because it’s the most painful part of the process.
*They tell you not to go over the same section more than once, but I’ve never had trouble with a second application to get straggling hairs as long as I powdered the area again.
*When you’re completely finished, you’ll no doubt have some wax on your hands, and some bits left behind. Before I ever get in the shower, I pour baby oil into my hands and remove it and the wax bits with a paper towel. Next I pour more into my hands and rub it everywhere the wax touched. I feel for stuck bits as I rub it across the area, scraping gently with my fingernail to loosen them as I find them. I then wipe that all off with another paper towel. I shower using ivory soap on the waxed area which cuts through the oils very effectively.
*After showering, I apply No Bump to avoid ingrown hairs. It’s a good idea to use it after every shower, but it burns like fire the first time you use it after waxing.
If you keep up with waxing, it’s faster because your hair doesn’t all grow in at the same time. It takes me around 50 minutes to wax now.
heather Koboah –
Pulls all courseness of hair out and stays flexible